SnapTara Blog
Shadow Photography: How to Shoot Strong Shadows and Silhouettes
Strong shadows are not a problem to fix. They are the subject. On a bright day the sun draws bold shapes across walls, stairs and pavement for free, and a camera or phone set up for those shapes will turn an ordinary street into a graphic picture. The trick is simple to say and takes a little practice to do: expose for the bright parts, let the shadows fall dark, and keep the shapes clean enough to read in a glance.
The idea
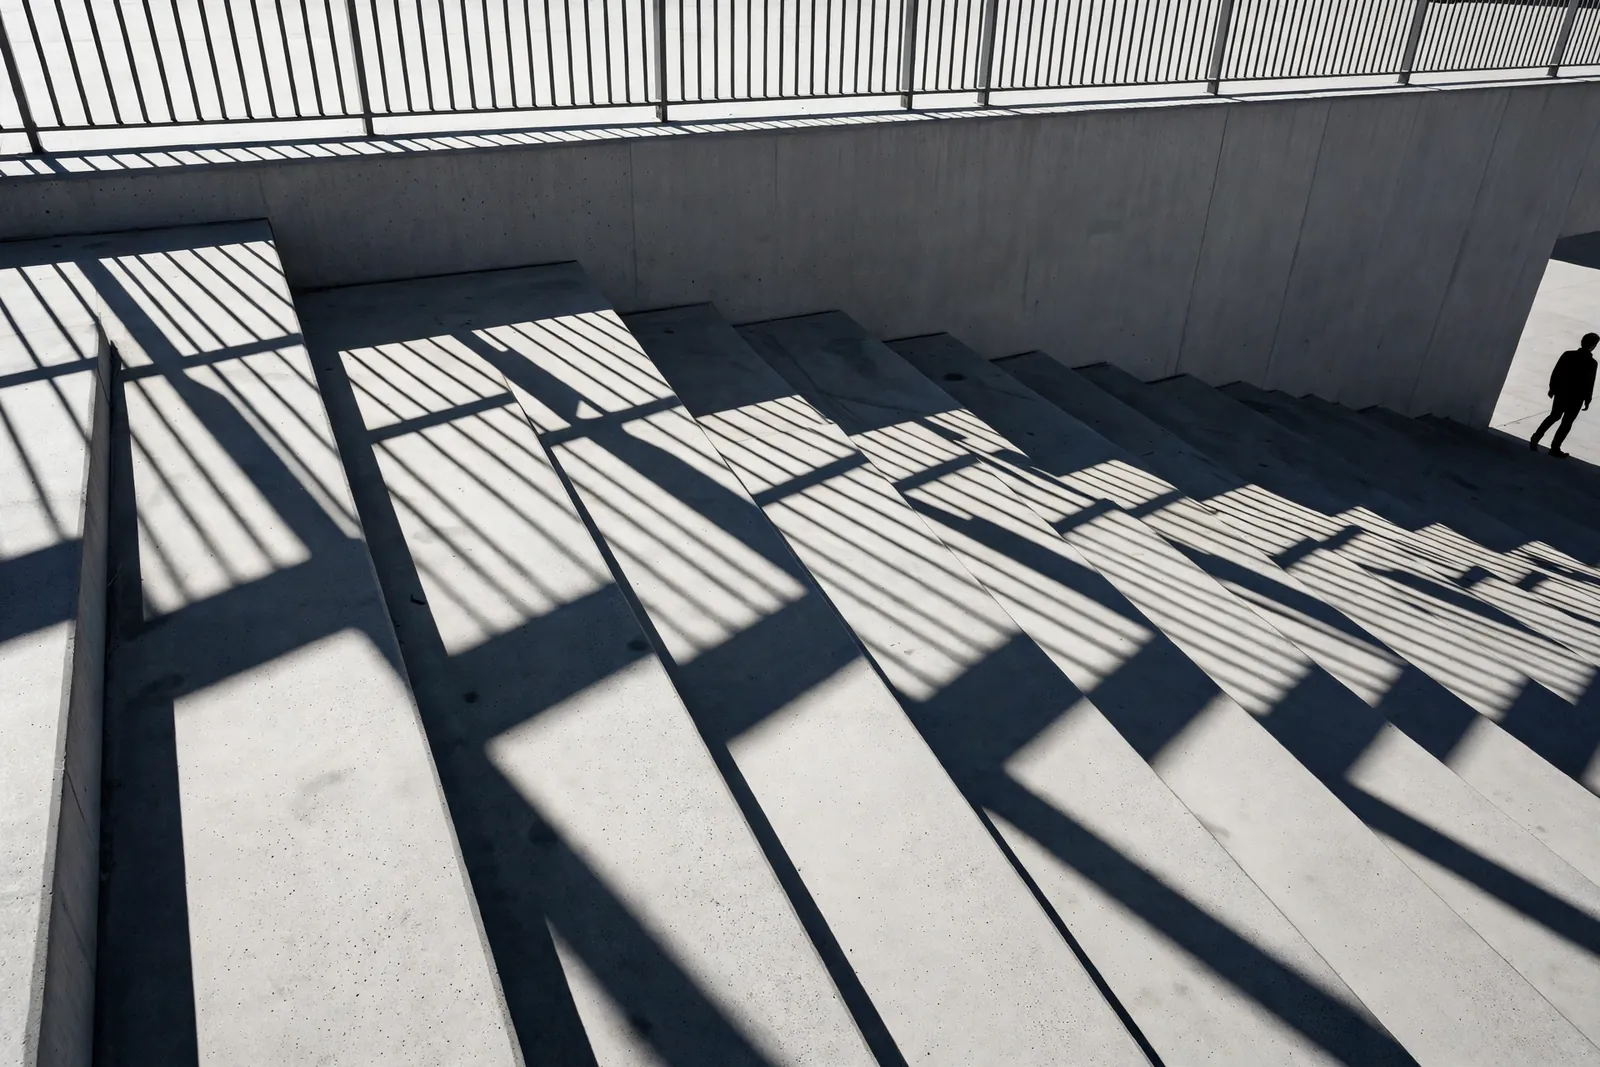
This weekend, go out in hard sun and hunt shadows on purpose. Walk a short route you know well and look only at the ground and the walls, not at the objects themselves. Railings, fences, stairs, trees and people all cast shapes that are often more interesting than the things casting them. Set yourself one hour and one goal: come home with five frames where the shadow is the main subject, plus one silhouette of a person against a bright wall, a bright window or open sky. Work slowly. Find a strong shape first, frame it, and then wait for a person to walk through it. One short prompt sums up the whole shoot: photograph the shadow as if it were the subject.
How to capture it
Where and when
You need direct sun, so pick a clear day and an open place where light falls without cover: a plaza, a wide pavement, exterior stairs, a bridge, a parking level or a south facing wall in a side street. Buildings with railings and fences nearby give you repeating shapes to work with. Go between about ten in the morning and three in the afternoon for short and bold shadows with dark cores, or head out in the last hour of light if you want long shapes that stretch across the whole frame. Both work. The middle of the day gives you graphic patterns at your feet, while late light gives you drama and length. Cloudy light will not do this job: it softens every edge and turns the shadows pale, so save this shoot for a sunny day and use an overcast day for something else.
Settings
On a phone, the main job is to stop the phone from brightening the shadows for you. Tap on the brightest part of the scene, then slide the exposure down until the shadows go properly dark and the lit ground holds its detail. Press and hold to lock focus and exposure once it looks right, and leave the flash off. Use the main lens rather than digital zoom, because clean edges matter more than reach here, and turn on burst mode when you are waiting for a walker to cross your shape. If you edit afterwards, edit with a light hand: deepen the dark tones and add a touch of contrast, and leave the lit areas alone. On a camera, use spot metering and meter on the bright ground or wall, not on the shadow, so the camera exposes for the light and lets the dark areas fall where they belong. Aperture priority at f/8 to f/11 keeps the shapes sharp from front to back, a shutter speed of 1/500 or faster freezes people in full stride, and a low ISO such as 100 to 400 keeps the dark areas clean. For a silhouette, meter on the bright sky or the bright window behind your subject and focus on the subject itself: the subject will record as a clean dark shape against the light.
Composition
Simple reads strong. Fill the frame with the pattern and cut out anything that does not serve it: bins, parked cars and stray signs all break the spell. Let a shadow run on a diagonal through the frame, because diagonals give a flat surface energy and lead the eye from corner to corner. Leave some clean ground around your main shape so it has room to breathe, and watch the edges of the frame, where a stray half shadow can pull attention away from the one you chose. For silhouettes, the outline is everything. Your subject needs a clean and readable shape against the light, with the head clear of dark objects behind it and arms and legs apart enough to read as a person rather than a blob. Wait for the moment when a walker is fully inside the bright area and fully clear of other shapes, and take several frames rather than one.
Mistakes to avoid
- Letting the camera expose for the shadows. Automatic exposure tries to show detail everywhere, so it lifts the shadows, washes out the light and leaves you with a flat grey picture. Expose for the bright parts and let the shadows be dark.
- Shooting in soft light and expecting bold results. An overcast sky gives faint shadows with no edge and no depth. This is a technique that needs hard sun, and no setting can invent a shadow that is not there.
- Clutter behind your subject. A silhouette merged with a dark building or a tree loses its outline and stops reading as a shape. Move your feet until the subject sits against plain light and nothing else competes with it.
Variations to try
- Shadow only: crop the object casting the shadow out of the frame entirely and photograph just the shape on the ground or wall. The picture becomes abstract, and viewers enjoy working out what made it.
- Silhouette portrait: ask a friend to stand in front of a large bright window or against open sky at the end of the day, expose for the light behind them, and shoot a simple portrait with no detail in the face at all. A hat, a bicycle or a raised hand gives the outline more to say.
- Same place, late light: return to your best spot in the last hour of the day and shoot the same shapes again. The shadows stretch, the patterns change completely, and the pair of visits teaches you more about light than a week of reading about it.
If learning to see light like this hooks you, the Light Chasers Challenge on the homepage builds exactly this skill: two weeks of prompts about finding light, shaping it and shooting what it draws, most of them doable within a short walk of home.
Want another idea like this one? The free SnapTara generator on the homepage hands you a fresh photography prompt in seconds, drawn from more than a thousand hand written assignments, and its themed Challenges turn a single idea into a week or a month of shooting.
Get a photography prompt