SnapTara Blog
What to Photograph on a Rainy Day
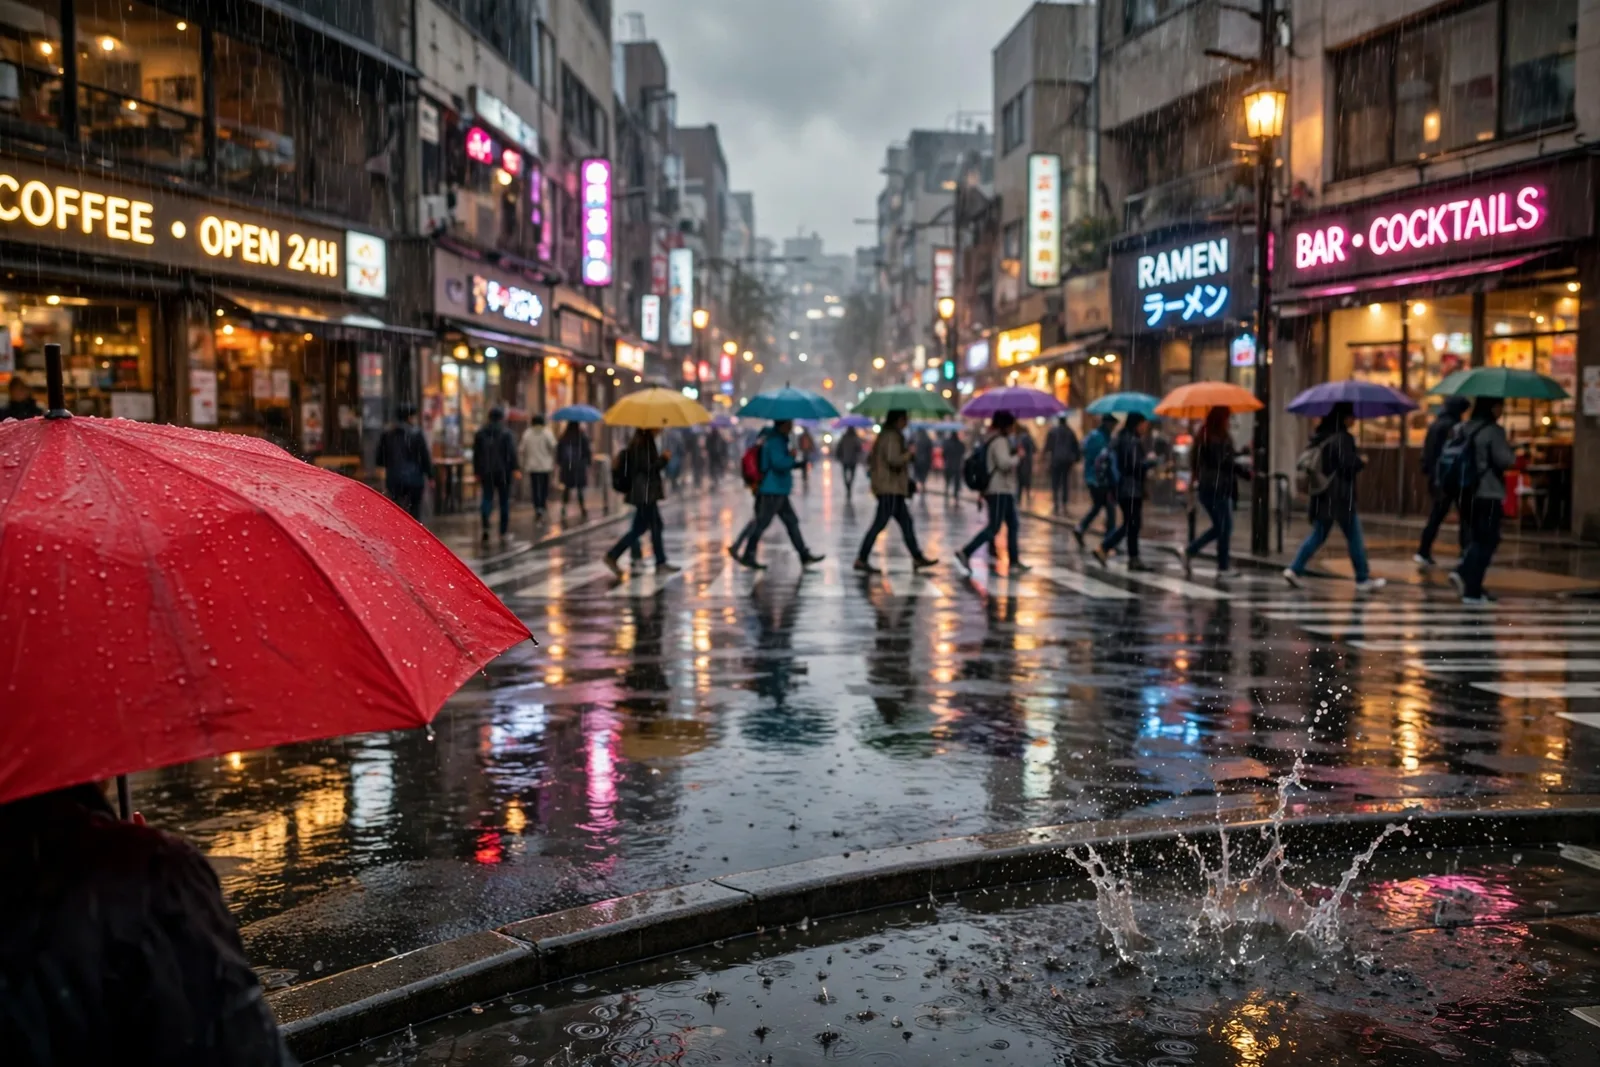
A rainy day is one of the best times to photograph a street, not a reason to stay home. Wet pavement turns into a mirror, umbrellas carry strong colour into a grey scene, and the rain itself shows up as drops, rings and splashes. Pick one sheltered corner, watch the rain pass it, and shoot colour, reflections and falling water while you stay mostly dry.
The idea
Choose one corner that gives you cover: an awning, a deep doorway, a bus shelter or the edge of an arcade on a street people actually use. Stay there for about 30 minutes and let the rain bring the subjects to you. Umbrellas cross in waves each time the lights change. Shop signs double themselves in the wet pavement. Every passing step sends up a small splash at the curb. Work the corner in a loose order: wide frames of the crossing first, then the reflections at your feet, then close frames of drops and splashes. One short prompt keeps the session focused: one bright umbrella crossing a wet street. Protect your gear the cheap way while you work. A camera rides happily inside a clear plastic bag with a hole cut for the lens and a band holding the plastic at the hood, a shower cap stretches over the body between showers, and a phone shoots fine through the front of a zip top food bag. Keep a dry cloth in a pocket and treat wiping the lens as part of every shot, not as a chore saved for later.
How to capture it
Where and when
Go while the rain is falling, and stay for the hour after it eases, because both halves of the shoot give you different pictures. During the rain you get movement, splashes and umbrellas in motion. After it, the air clears, the pavement turns calm and still, and reflections sharpen into near perfect mirrors. The richest window is late afternoon into early evening, when shop lights and street lights switch on while the sky is still grey and the wet ground doubles every light source. A crossing near shops, a market entrance or a row of cafes gives you steady foot traffic and plenty of lit signs to reflect. Stand under cover at the edge of the flow rather than in the middle of it, keep doorways and crossings clear, and let people pass through your frame instead of stepping out in front of them.
Settings
On a phone, use the main lens and resist pinching to zoom in the rain, because wet fingers and digital zoom both soften the frame. Tap to focus on the umbrella or the reflection you care about, then slide exposure down a little so bright signs and pale wet stone keep their detail. Turn the flash off, hold the phone in both hands under your cover, and use burst mode when boots and wheels hit standing water, then pick the one frame where the splash peaks. Wipe the lens before each burst, since a single drop turns lights into smears. On a camera, shutter speed is your main creative choice. Use 1/1000 of a second or faster to freeze splashes and single drops in the air, or slow down to 1/30 or 1/60 of a second, braced against a post or a wall, to stretch the rain into fine streaks. Shoot in aperture priority at f/2.8 to f/5.6 so your subject lifts clear of the busy street behind it in flat grey light, keep auto ISO on, and use a single focus point placed on the umbrella or the splash rather than on the crowd as a whole.
Composition
Think of the frame in two layers: the scene above the ground and its twin glowing in the wet ground below. Tilt down until the reflection fills the lower half of the frame and the real subject sits in the upper third, and the picture gains depth without moving your feet. Place one bright umbrella off centre against grey coats, grey stone and grey sky, because a single patch of strong colour reads as the whole story of the frame. Look down as often as you look out: rings spreading in a puddle, a fallen leaf floating in reflected light, boots stepping through a bright patch of colour. When the rain streaks a window or a bus shelter panel near you, shoot through the wet glass with the drops sharp and the street soft behind them. Keep horizons level, since tilted reflections look like a mistake even when the street itself felt chaotic.
Mistakes to avoid
- Letting drops sit on the lens. Rain on glass turns every light into a soft smear and flattens the colour you came out for. Wipe the front element or the phone lens with a dry cloth before every frame you care about, and shoot from under cover so the wiping lasts longer than one shot.
- Shooting only wide grey views from far away. A full street in flat rain light reads as dull weather, not as a subject. Move closer, tilt down to the reflections, and fill the frame with one umbrella, one splash or one glowing patch of wet pavement.
- Packing up the moment the rain stops. The calmest and sharpest reflections arrive after the rain eases, when puddles settle and the pavement stops rippling. Leaving at the last shower means missing the mirror half of the shoot entirely.
Variations to try
- Shoot the rain itself: make the water the subject instead of the backdrop. Freeze single drops and crown shaped splashes at a fast shutter speed, then slow the shutter down and shoot for streaks against a dark doorway or a lit shop front.
- Work one colour: pick a single colour at the start, such as red, and spend the whole session on red umbrellas, red coats, red signs and their reflections. Rain greys the rest of the street, so a colour hunt stays honest and the set hangs together.
- Shoot through wet glass: step into a cafe or stay on the bus and photograph the street through a rain covered window. Focus on the drops and let the world behind them melt into soft colour, or focus through the glass and let the drops become texture in front of a sharp scene.
If wet light hooks you, the Light Chasers Challenge on the homepage spends fourteen days learning to see and shape light in all its forms, and a rainy street, where every light source appears twice, is one of the best training grounds it offers.
Want another idea like this one? The free SnapTara generator on the homepage hands you a fresh photography prompt in seconds, drawn from more than a thousand hand written assignments, and its themed Challenges turn a single idea into a week or a month of shooting.
Get a photography prompt